

For a gradient manicure you need the following:
White polish
Top coat
Make-up sponge, dampened and squeezed out
Scrap paper
Nail varnish remover
Cotton buds
Nail Polish
What colours to use? The big decision! I love pastels for gradients, I also love mixing it up with dark and lights together, and also just using variants of the same colour. Really, you can do just about anything, but what I would recommend is that you pick polishes with similar opaqueness after the same amount of coats (e.g. don't use one colour that you need 3 coats to get opaque with a one-coater, as this just won't merge together nicely, as one will over-power the other). Decide how many colours you want to use. Generally I will use at least three or four different polishes, but bear in mind the length of your nails, and what you will be able to fit on. Also, last tip; try to keep the tones of the polish similar, e.g. all pastels, all brights, as mixtures are a bit trickier to merge together nicely.


For this, I am using the following polishes: Sun of a Peach, Heli-Yum, That's Shore Bright and Coconut Kiss.
First off, paint your nails a white base colour. You do need a basecoat as you are sponging colour on, and you don't really want to be doing it onto naked nail, as you might not get a deep enough colour (depending on the colours you are using) and this helps the colour "pop" more. It doesn't need to be totally perfect application, as you are going to be covering it up anyway. Ensure this is completely dry before you start your gradient, otherwise your make up sponge will pull off your base.


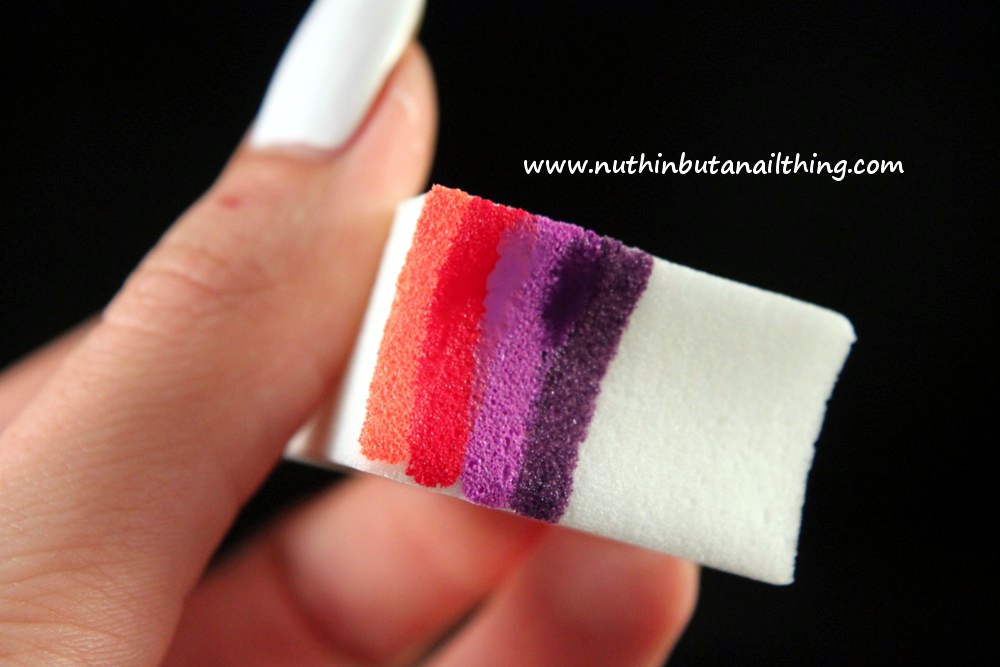
Right, now for the sponging! So, what I'd recommend you doing is getting all your polishes ready, undone and lined up next to each other in the order that you are going to use them. Get your make up sponge and run it under the tap, and squeeze out the excess, so it is damp. Now, paint your polish onto the sponge in lines. Bear in mind the length of your nails and the amount of colours you are using, to make sure you've got the right amount of polish onto your sponge.


Don't worry about getting polish over your fingers, you can tidy this up afterwards. You can probably do 2/3 nails per application of polish to the sponge. Also, the good thing about this is that your nails will dry pretty quickly. I'd then repeat this process all over again one or two more times, so that your nails will then have good coverage.


Once you are happy with your nails, then you will need to do some clean up. However, before this, apply top coat to your nails and let it dry. This helps seal in the design, and if you do nudge it slightly during clean up, you won't be taking the gradient off, only a little bit of top coat.


Tip a little bit of polish into the lid of the nail varnish remover and dip the cotton bud in. Use the cotton bud to carefully wipe off any excess polish on your fingers. Be careful not to wipe any of the polish off your nails. If you've got a thin paintbrush, you could use that instead to be a bit more precise.
Then once you are done, final top coat, and it's good to go.


Whilst gradients look pretty smashing on their own, I am a massive fan as using them as a base for something else, so on this manicure I've kept it fairly simple and just covered my nails with white polka dots, but I think they look great for with leopard print, topped with a glitter, or with water decals over the top... or start with a base colour of white, add some striping tape, and put your gradient over the top of that. The possibilities are endless!


Anyway, I hope you've found this tutorial useful! If you do give this a go, please feel free to share with me on my facebook page.
Visit Salons Directs website: http://www.salonsdirect.com/ Follow Salons Direct on Facebook: http://www.facebook.com/SalonsDirect Follow Salons Direct on Twitter: http://www.twitter.com/SalonsDirect
*The polishes used in this post were provided to me by Salons Direct
Great tutorial! Thanks for that :-)
ReplyDeletePleasure! x
DeleteBrilliant! I've never heard of wetting the sponge before, I'm so going to have to try it because your gradients are the best! thanks for this Claire xx
ReplyDeleteAh thank you Char. xx
DeleteI have tried to do gradient for the longest and it never did come out right. I also never heard of wetting the sponge so it might have been that>.<
Deletethanks for the great tutorial! I've only tried gradient nails once but I had some bits of the sponge stuck on the nails. I know what to do now!
ReplyDeleteHooray! x
DeleteLoving the colours on this one and the polka dots are just perfect!
ReplyDeleteThank you Vic. xxx
DeleteThank you for this tutorial. I tried stamping once (without a base coat) and it came out horribly. I am going to try it again thanks to your tutorial :)
ReplyDeleteBrill! Let me know how it goes. xxx
DeleteThese look fab! I've just had a go at creating a gradient using your technique and I'm really pleased with how it came out :-) (http://mymintnails.blogspot.co.uk/2013/06/3-colour-pastel-gradient.html)
ReplyDeleteDefinitely want to try it again with different colours! X
Ace! x
DeleteFantastic tutorial! I've never dabbed the sponge on paper before! I'll have to try that! Thanks for the tip! <3
ReplyDeletePleasure! x
Deletelove the colors you used! so pretty :)
ReplyDeleteThank you! x
DeleteI cut the sponge to fit my nail so I never have any mess to clean up on my fingers or around the edges.
ReplyDeleteOh that's a great idea too x
DeleteDo you apply new polish on a unused part of the sponge or on the part with the colours you already used?
ReplyDeleteIt seems that both would have their good and their bad points.
I just keep reapplying over the area I've already used, that seems to work fine really. x
DeleteUmmm... does it matter what sponge you use? b/c I was using this yellow clean up sponge that was a little porous and felt more like a makeup sponge than one used for cleaning up soup stains, but do I need to use an actual make up sponge? because i cant find them at the stores... im probably looking in the wrong place...
ReplyDeleteI haven't tried a clean up sponge to be honest, but you can usually find the cheap triangular make up sponges at really shops (I am assuming you are in the US) but in the UK we have some cheap drug stores that you can buy big bags of them (like 30 for £2), it might be worth looking in a cheaper place, or a supermarket.
DeleteHave you ever used colorshow nail polish? Their polish is kinda cheap but really good b/c its opaque and easy to put on and they have the best colors! xD
ReplyDeleteI do have a few of them and I love their yellow! (LOVE YELLOW ME!) Sinful Colors are also really good too. x
Deletei love doing my nails so may i will try this, it sounds like a great idea!i might try it with Christmas colors!
ReplyDelete:-)
DeleteGreat tutorial and fabulous manicure! :-)
ReplyDelete